
What you see
The Magnetic Stabilizer starts where Instability at 99% ends: the two chains in the P.A.T. bring you here, apart. The Hook Gun player comes through a door into a corridor east of the lab. The Goop Gun player is in a closed room further east whose only way out is a duct. The game saves The Magnetic Stabilizer once you both stand on the pressure plate in front of the lab door.
North of the lab and its walkway, the long magnet bay runs east to west, with a crane that carries the stabilizer and a flip door in the middle. Under the lab floor is a lower floor with an office. The two final chains hang on the same floor, one on top for the Goop Gun player and one underneath for the Hook Gun player, who gets there upside down. Pulling both lowers the two-sided bridge across the bay: Instability at 96% starts there, with the Goop Gun player by the gate to the bridge and the Hook Gun player right below, upside down.
How it works
- Hook-only chains (pins 4 and 15) can only be pulled by the Hook Gun player. They spring back when let go, and whatever they opened closes again.
- The pressure plate (6) needs both of you on it at once.
- The three toggle buttons (8, 13, 14) stay on until someone presses them again. Either of you can press them, by hand or with the hook.
- The lock button (10) only works while goop sits on its goop target (11), and once pressed it stays down for good. The target is behind a hatch that is only open while the Hook Gun player holds its handle with the hook.
- Rounded edges are magnetic ramps: walk over one and gravity turns with you, so you stand on the wall or the underside beyond it. They work for both of you. The one at the west end of the west room (17) leads down the wall and onto the underside of the lower floor.
- A floor plate at the edge of the office (18) juts across the lower half of that ramp and blocks it. The chain on the office floor (19) slides the plate in under the office while it is held; let go and it slides back.
- The two final chains (22) hang on the same floor, one on top and one underneath. Both have to be pulled all the way at the same time.
- The crane in the magnet bay runs by itself: the lock button starts it and the final chains send it on its last move. It has no controls of its own.
- The curved roof of the magnet bay only holds the Goop Gun player.
| Control | Who | Pin | What it does |
|---|---|---|---|
| Hook-only chain in the corridor | Hook Gun player | 4 | Opens the duct hatch above it while held |
| Goop lump on the east wall | Goop Gun player | 3 | Grows into a platform you can climb |
| Pressure plate | Both of you | 6 | Opens the lab door and saves The Magnetic Stabilizer |
| Toggle button 1 | Either of you | 8 | Opens the door to the walkway (9) and holds hatch A open (27) |
| Clamp hatch handle | Hook Gun player | 11 | Holds the hatch in front of the goop target open |
| Goop target behind the clamp hatch | Goop Gun player | 11 | Switches the lock button on |
| Lock button | Either of you | 10 | Stays down: opens the west room door (12) and starts the crane |
| Office chain | Goop Gun player | 19 | Slides the floor plate (18) off the magnetic ramp while held |
| Final chain underneath | Hook Gun player | 22 | Both at once: the bridge, Magnets and Instability at 96% |
| Final chain on top | Goop Gun player | 22 | Both at once: the bridge, Magnets and Instability at 96% |
| Toggle button 2 | Either of you | 13 | Opens the pipe hatch at the north end of the bay (26) and saves |
| Toggle button 3 | Either of you | 14 | Moves the flip door (24) |
| Hook-only chain on the pillar | Hook Gun player | 15 | Opens the pipe hatch in the ceiling above it while held |
| Ring on the air duct hatch | Hook Gun player | 16 | Opens one of the two air duct hatches while held |
| Goop target on the air duct | Goop Gun player | 16 | Opens the other air duct hatch while goop is on it |
Maps
Top views, north up, one per floor. A number means the same thing on every map; the steps below use the same numbers.
Start floor: corridor, plate and lab
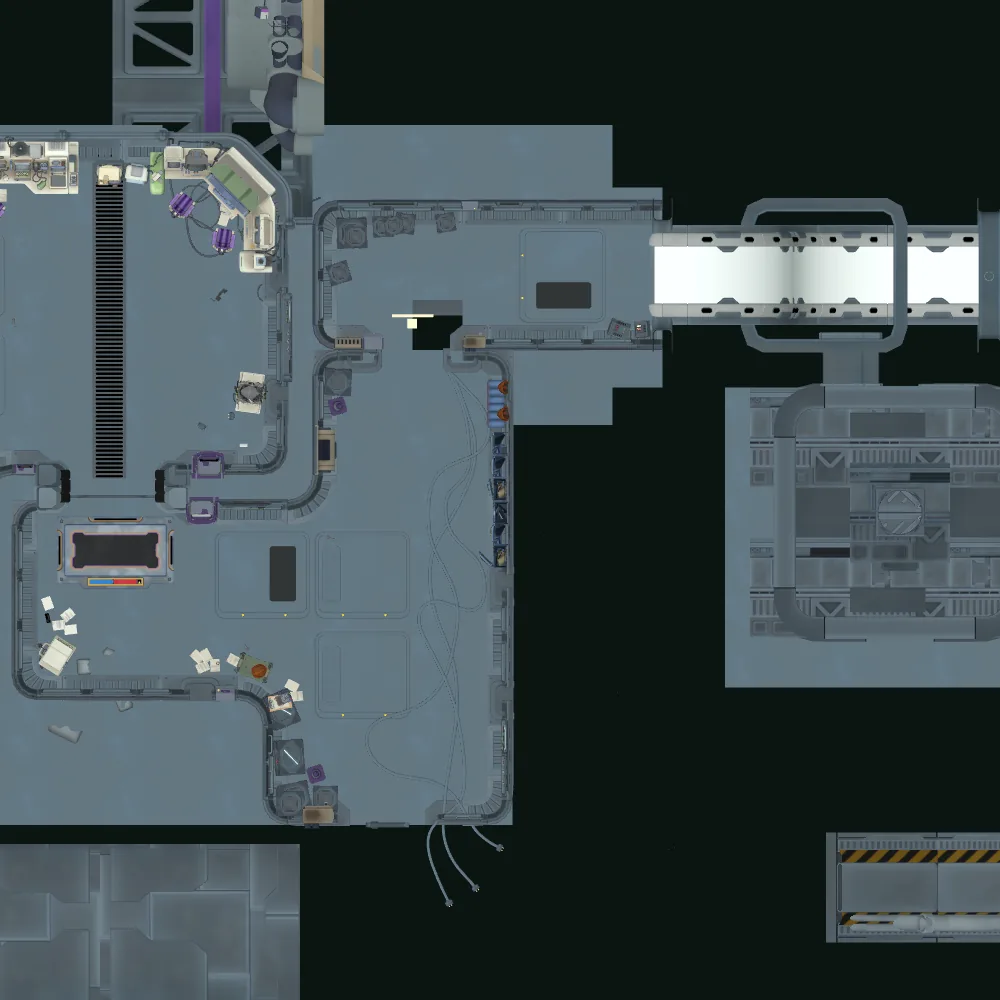 12456785 m
- 1Hook Gun player's start, in the corridor
- 2Goop Gun player's start, in the closed room
- 4Hook-only chain high on the corridor's east wall; the duct hatch is above it
- 5Door at the corridor's north end
- 6Pressure plate
- 7Lab door
- 8Toggle button 1, in the lab's north-east corner
The Goop Gun player's start room
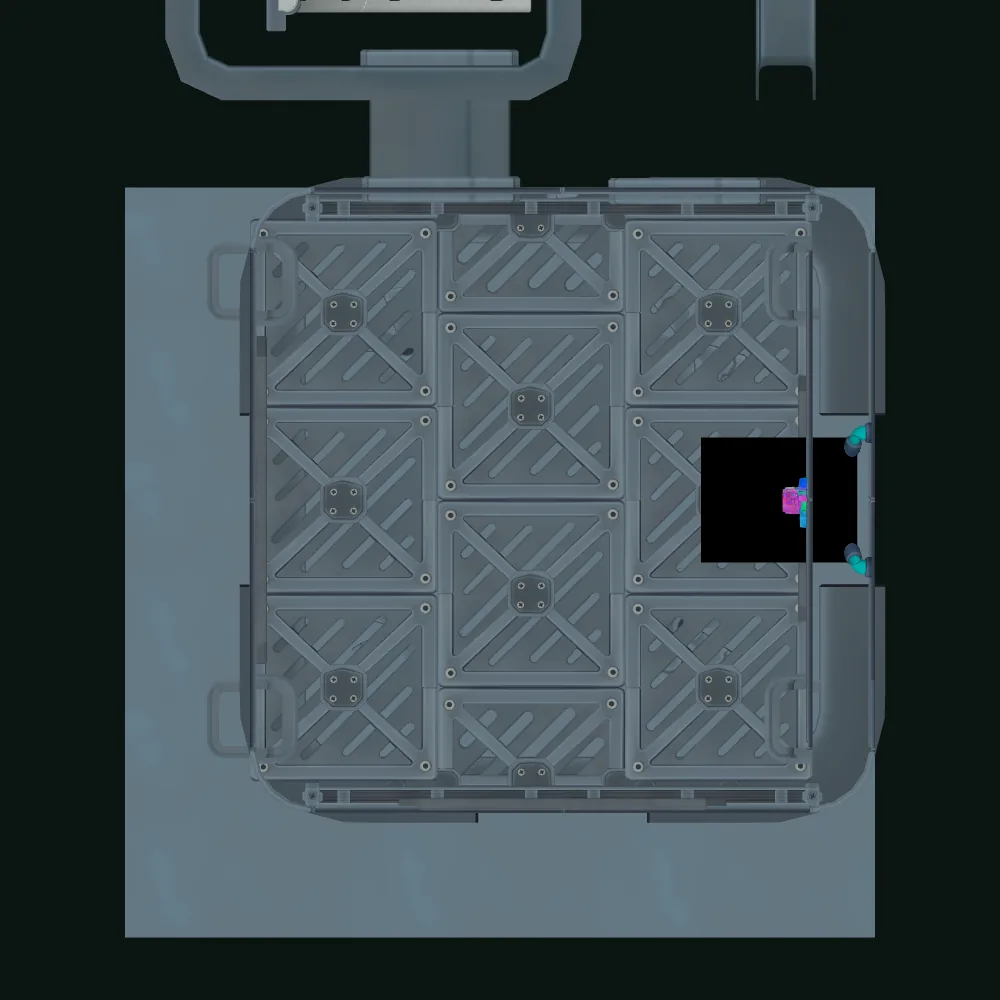 235 m
- 2Goop Gun player's start, in the closed room
- 3Goop lump on the east wall
The duct above the corridor
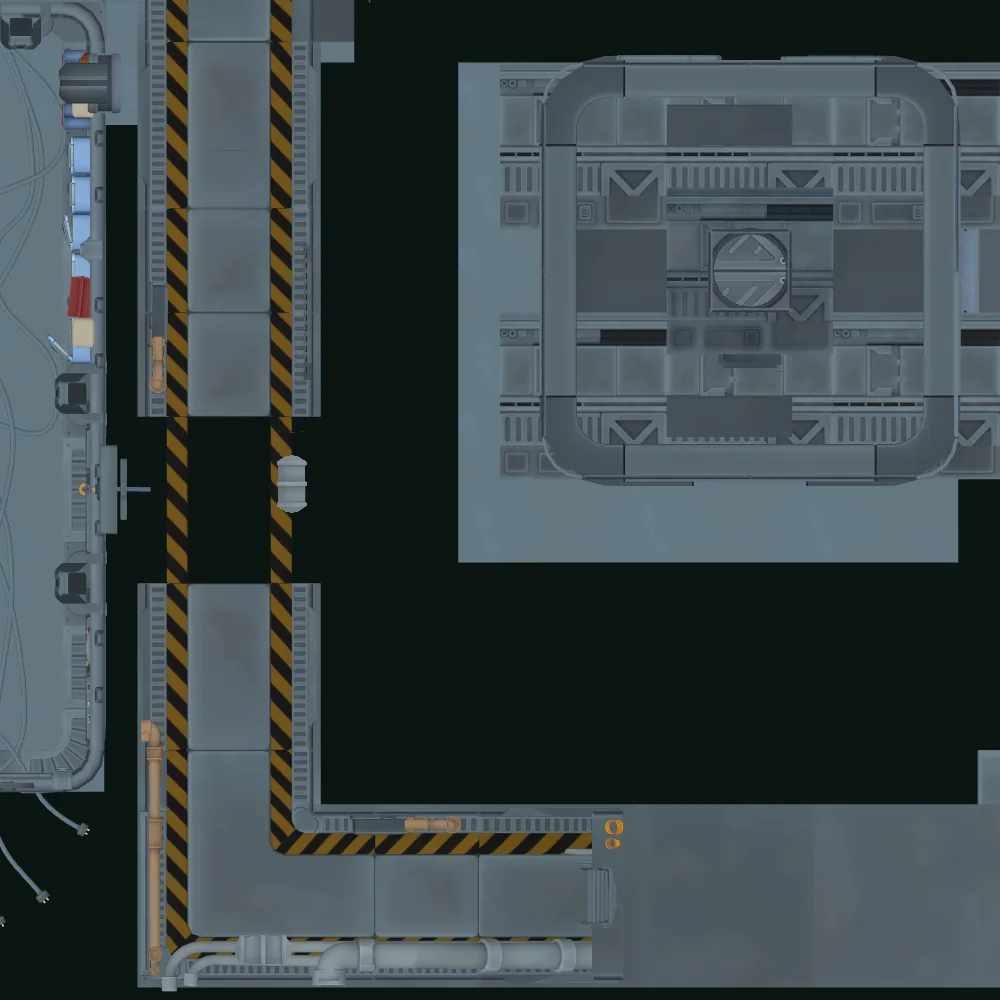 2345 m
- 2Goop Gun player's start, in the closed room
- 3Goop lump on the east wall
- 4Hook-only chain high on the corridor's east wall; the duct hatch is above it
Lab floor: walkway, west room and machine room
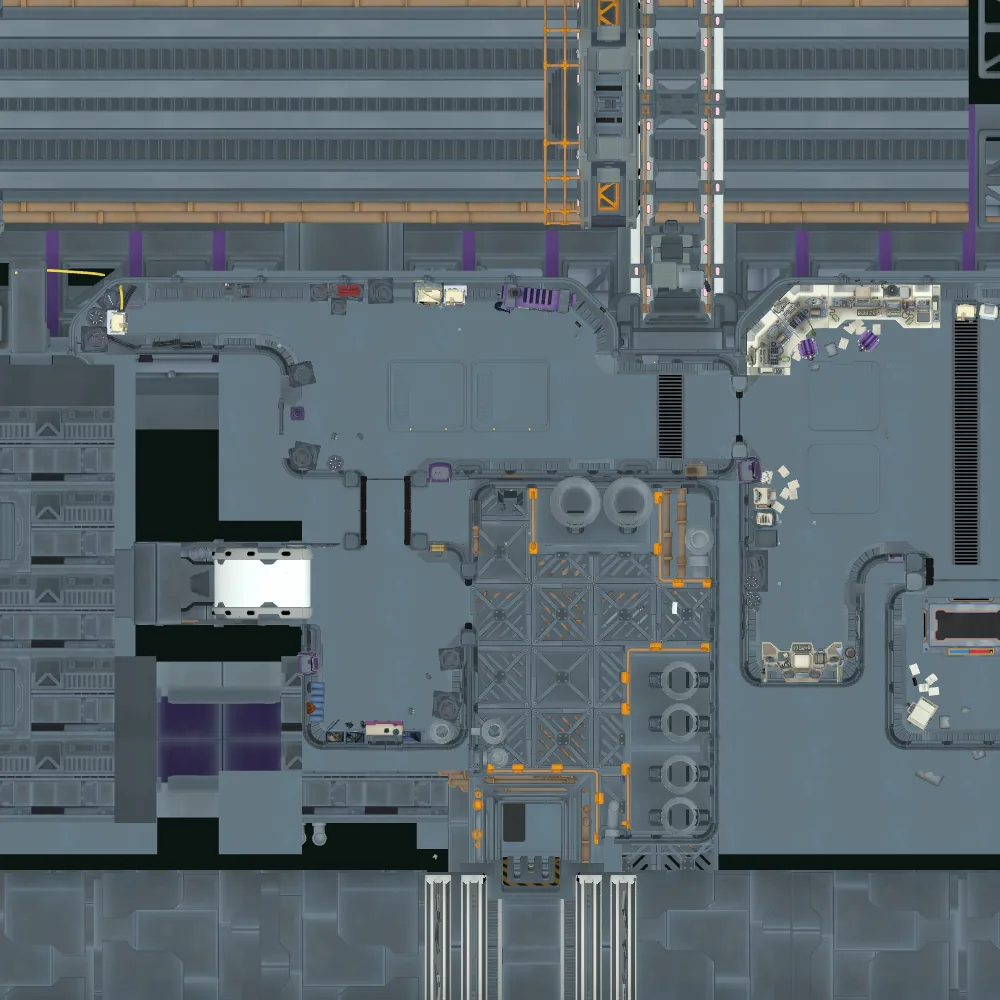 678910111213141516175 m
- 6Pressure plate
- 7Lab door
- 8Toggle button 1, in the lab's north-east corner
- 9Door from the lab to the walkway
- 10Lock button
- 11Clamp hatch handle, high on the end wall, with the goop target behind it
- 12West room door
- 13Toggle button 2
- 14Toggle button 3 (flip door)
- 15Hook-only chain on the pillar; the pipe hatch is in the ceiling above it
- 16Shaft behind the railing, with the air duct hatches across it
- 17Magnetic ramp: the rounded west edge of the west room
Lower floor: office, stairs and the room under the lab
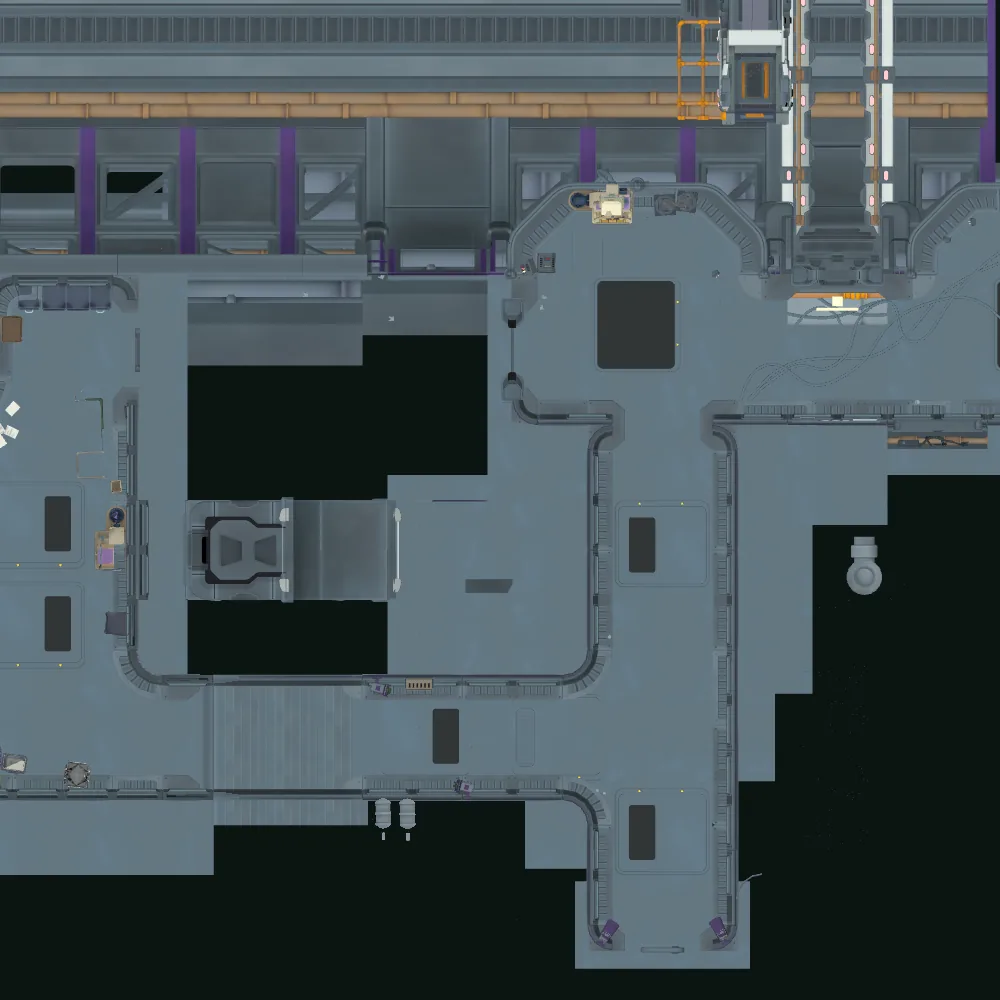 16171819202122235 m
- 16Shaft behind the railing, with the air duct hatches across it
- 17Magnetic ramp: the rounded west edge of the west room
- 18Floor plate across the lower half of the ramp
- 19Office chain
- 20Stairs between the office and the lower floor
- 21Lower corridor
- 22The two final chains: one on top of the floor, one hanging under it
- 23Gate to the two-sided bridge
The magnet bay from above
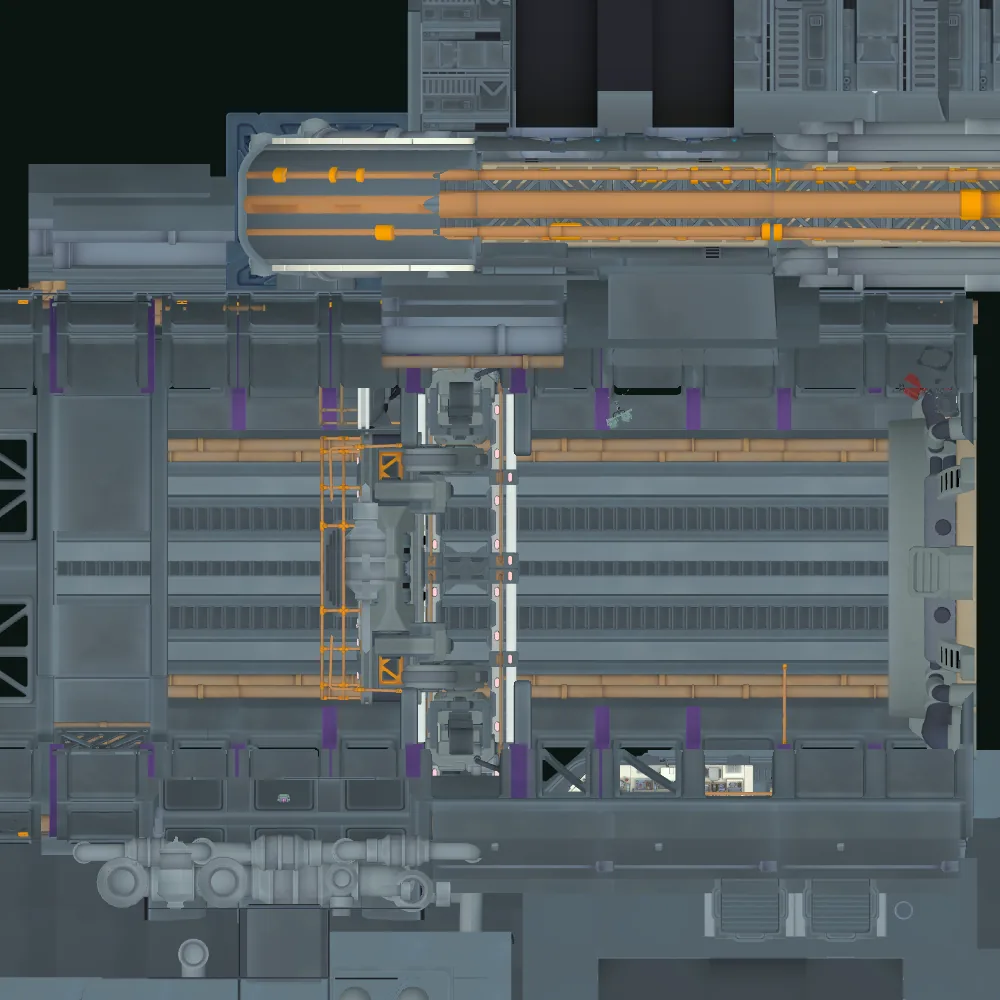 242526275 m
- 24Flip door
- 25Vent opening in the bay roof
- 26Pipe hatch at the north end of the bay
- 27Catwalk; hatch A is at its east end
Solution
Show hint
The last two chains hang on the same floor, one on top and one underneath. The underside is reached over the rounded edge at the west end of the west room, but only while someone in the office below holds the office chain.
Before that, the way west opens in this order: the duct hatch (the Hook Gun player's chain in the corridor), the pressure plate (both of you), toggle button 1, then the lock button (the hook holds the hatch open, goop goes on the target).
Show the answerSpoiler
1. Get the Goop Gun player out of the start room345
Goop Gun player: goop the lump on the east wall of your room (3) so that it grows into a platform, climb it and follow the duct beyond. It runs round to the west and north and ends at a hatch over the corridor. Hook Gun player: walk to the south end of the corridor and pull the hook-only chain high on its east wall (4). Keep holding it: the hatch in the duct above opens and the Goop Gun player drops into the corridor. The door at the corridor's north end (5) shuts once the Goop Gun player is down.
Not in the game files: how many goop shots the lump needs before you can climb it. It already holds one; one more makes it a small platform, two more a large one.
2. Both onto the pressure plate67
Both: stand on the pressure plate west of the corridor (6). The lab door north of it (7) opens and the game saves The Magnetic Stabilizer.
3. Open the way west89
Either of you: press toggle button 1 in the lab's north-east corner (8) and leave it on. The door on the lab's west side (9) opens onto the walkway along the south side of the magnet bay. The same button also holds hatch A open, at the east end of the catwalk above the bay (27).
4. The lock button111012
Both: walk west along the walkway to its far end. Hook Gun player: hook the handle of the clamp hatch high on the end wall (11) and keep holding it: the hatch opens in front of a goop target. Goop Gun player: goop that target, then press the lock button on the floor a few steps east of it (10). It stays down: the west room door (12) opens and the crane in the bay starts moving.
5. Goop Gun player: down to the lower floor1621
Goop Gun player: go to the machine room, the grated room south of the walkway, and walk to its south end (16). Behind the railing a shaft drops to the south end of the lower corridor (21). On its far (south) side is the round air duct with two hatches in it: they are open only while goop sits on the target above them and the Hook Gun player holds the ring below them with the hook.
Not in the game files: whether the Goop Gun player can climb over the railing straight into the shaft, or has to go through the opened air duct hatches first.
6. Goop Gun player: hold the office chain201918
Goop Gun player: from the south end of the lower corridor, take the passage west and climb the stairs (20) into the office. Pull the chain on the office floor (19) and keep holding it: the floor plate (18) slides in under the office and the lower half of the magnetic ramp is clear.
7. Hook Gun player: over the edge121722
Hook Gun player: go through the west room door (12), cross the west room and the short passage at its west end, and walk on over the rounded edge (17). Gravity turns with you: you walk down the wall, past where the plate was, and onto the underside of the lower floor, upside down. Once you are past, the Goop Gun player can let go of the office chain.
Hook Gun player: on the underside, head east, then north, under the floor beside the lower corridor, to the bump under the north side of the room below the lab (22). Your chain hangs there.
8. Both: the two final chains2122
Goop Gun player: go back down the stairs, then east and north along the lower corridor (21) into the room under the lab. In the bump on its north side (22) is the chain on top of the floor, right above the Hook Gun player's chain. Both: pull your chain all the way, at the same time, and hold.
9. What happens next23
At once the crane makes its last move and the game saves Instability at 96%. Magnets unlocks 20.5 s later. After 23.25 s the doors at the bridge's north end open, after 61 s the two-sided bridge comes down across the bay, and after 64 s the way onto it (23) is clear. Instability at 96% begins here: the Goop Gun player stands in the room under the lab, by the gate, and the Hook Gun player right below, upside down.
The other controls: the bay roof and the flip door1615251326142427
Above the air duct hatches (16) gravity is upside down: whoever comes out there stands on the machine room ceiling. At the north end of the ceiling, the pipe hatch (15) opens while the Hook Gun player holds the hook-only chain on the pillar below it. The vent behind it leads to an opening in the magnet bay's roof (25), and only the Goop Gun player keeps their footing on that curved roof.
Toggle button 2 (13) opens the pipe hatch at the north end of the bay (26) and saves a checkpoint you cannot pick from the menu. Loading it puts the Goop Gun player upside down at the east end of the bay roof and the Hook Gun player on the walkway next to the button.
Toggle button 3 (14) lifts and turns the flip door (24), which moves its work balcony from the bay's west side up to the roof; press it again and the balcony comes back. The balcony and the grated wall north of it have respawn points for the Goop Gun player only. The catwalk along the north side of the bay (27) leads east to hatch A, which toggle button 1 holds open.
Not in the game files: in the game files the two final chains depend on nothing but each other. Whether the game also makes you take the roof route or use toggle button 2 or 3 before them is not in the files.
Common mistakes
- The Hook Gun player lets go of the corridor chain before the Goop Gun player is through: the duct hatch shuts again.
- The Hook Gun player lets go of the clamp hatch handle before the goop is on the target: the hatch closes in front of it.
- Looking for the crane's controls: there are none. The lock button starts it and the final chains finish it.
- The Hook Gun player walks onto the rounded edge while the floor plate is still out: the plate blocks the way down. The Goop Gun player has to hold the office chain first.
- Pulling the final chains one after the other: nothing happens until both are pulled all the way at the same moment.
- Switching toggle button 1 off before the lock button is down: the door to the walkway closes again.
Achievement
MAGNETS!
Reactivated a Magnetic Stabilizer
How it unlocks (spoiler)
In the Magnetic Stabilizer (3-5), pull the last two chains all the way, so that both are fully pulled at the same time. It unlocks about 20 seconds later.
Read from the game files of version 1.1.1 (no guesswork). Something wrong in your game? Tell us and we will check it. Report a problem