
What you see
The Assembly Line is a tall hall with a conveyor belt along its north wall. The cargo lift at its west end only runs with two keys in its console: a green key locked in a white room next to the lift, and a purple key in a passage under the office above the hall. A fuse hangs from a small crane over the belt, out of reach.
You need the fuse for the door to the gallery round the lift, the gallery for the green key, and the office for the two monkey bars that open the key hatches. The Goop Gun player does the climbing and hangs on the bars; the Hook Gun player pulls the fuse and both keys in with the hook.
How it works
- The crane chain on the east catwalk (pin 4) lowers the crane 4.7 m while it is held fully pulled. Let go and it springs back, and the crane rises again.
- The Hook Gun reaches 8 m. With the crane up, the fuse is 11.9 m from the hall floor below it: too far. With the crane down it is 7.1 m away, so the Hook Gun player can pull it in from the hall floor right under it (pin 2).
- Put the fuse in the slot by the fuse door (pin 5): the door opens 2 s later and stays open. The fuse locks into the slot and cannot be taken out again.
- The fan in the north wall (pin 3) is the way into the duct up to the east catwalk. Goop on it stops it; only then can the Hook Gun player hook it. While the hook holds it, the stopped fan swings aside and the opening is free. Let go and it closes again.
- The pressure plate on the grey block (pin 10) takes any weight: one player or one goop blob. 1 s after that the purple plank (pin 11) folds down into a bridge from the ledge behind the plate to the only office window with no glass (pin 12). With the plate empty it folds back up and covers that window.
- Monkey bar 1 (pin 9) is on the office's west wall. Jump up, grab it and hang: while it is all the way down, the hatch at the north side of the lift gallery is open. Let go and it shuts.
- Monkey bar 2 (pin 13) is in the office's east corner. Held all the way down, it opens the green shutter in the hall's north wall (pin 14) 2 s later. Let go and the shutter shuts at once.
- Behind the green shutter stands a push-pull block: a crate with a container on top, 3 m tall, with an edge you can grab and climb. The hook pulls it; by hand either of you can push or pull it.
- The green key's hatch has a barrier that lets the hook through but not a player. The purple key hangs in the passage under the office, and the Hook Gun player hooks it through a low gap from the push-block channel. So the Hook Gun player takes both keys.
- On the lift, face the console (west): the green key slot is on the left, the purple one on the right. With both keys in, the console lights up and the game saves. Then both of you stand on the lift and pull its two-handled chain all the way: the lift starts.
- Falls don't hurt you in this hall. The game only stops you walking off an edge higher than 1.5 m; crouch to drop down.
| Job | Who | Pin |
|---|---|---|
| Hold the gooped fan open with the hook | Hook Gun player | 3 |
| Climb into the duct, pull and hold the crane chain | Goop Gun player | 34 |
| Pull the lowered fuse in with the hook | Hook Gun player | 2 |
| Put the fuse in the fuse slot | Either of you | 5 |
| Climb to the office with goop | Goop Gun player | 101112 |
| Hang on monkey bar 1 | Goop Gun player | 9 |
| Hook the green key through the hatch | Hook Gun player | 78 |
| Hang on monkey bar 2 | Goop Gun player | 13 |
| Pull the block out, climb into the channel, hook the purple key | Hook Gun player | 141615 |
| Put both keys in the console | Either of you | 18 |
| Stand on the lift and pull its chain | Both of you | 18 |
The Goop Gun player spends most of this checkpoint up in the office. Before you split up, agree who calls "hanging" and "got it": the hatch and the shutter shut the moment the bar is let go.
Maps
Two top views of the same area, north up, at the same scale and with the same pins. The upper level shows the office, the gallery round the lift and the catwalks. The lower level cuts the office floor away and shows the hall floor, the conveyor belt, the duct behind the fan and the passage under the office.
Upper level
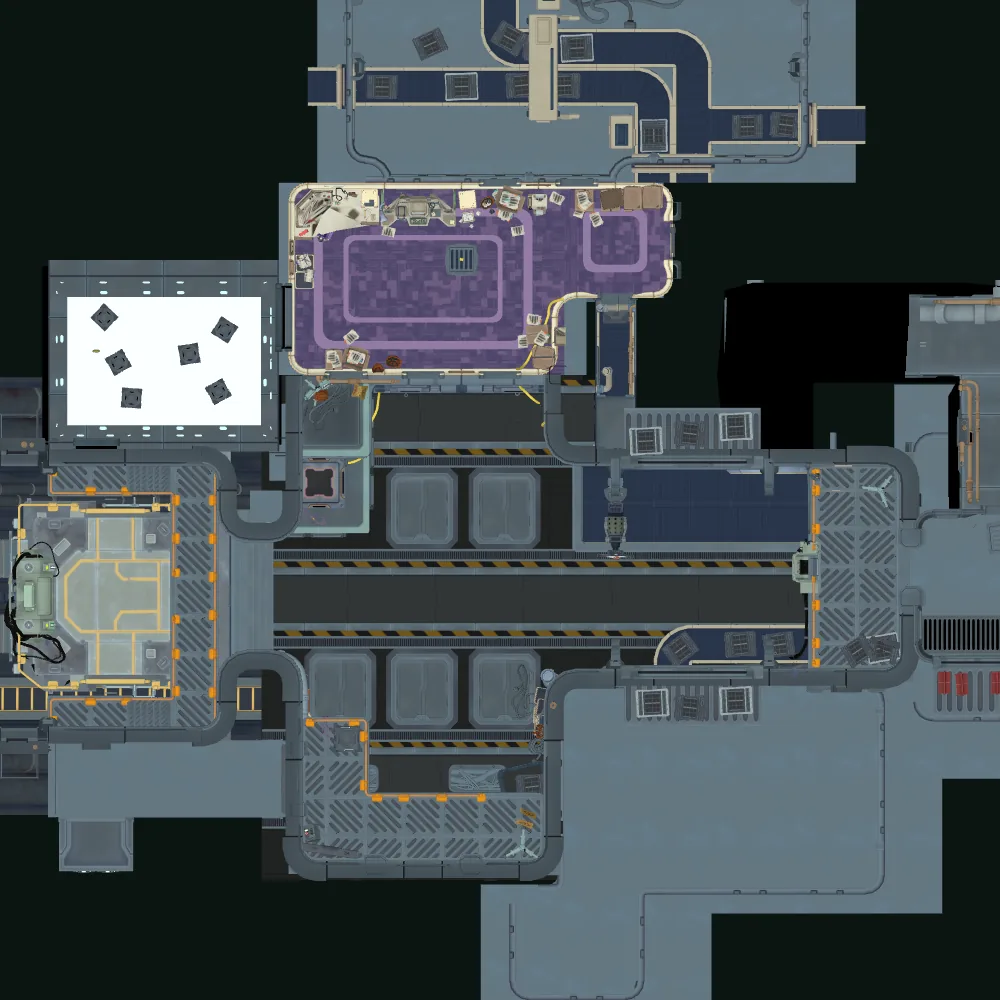 123456789101112131417185 m
- 1Start: lower corridor (both of you start here when you pick 3-2)
- 2Fuse on the crane: hook it from the hall floor right below
- 3Fan in the north wall: the way into the duct
- 4Crane chain on the east catwalk, at the top of the duct
- 5Fuse slot and fuse door
- 6Stairs up to the gallery round the lift
- 7Gallery, north side: stand here for the green key
- 8Green key in the white room, behind the hatch
- 9Monkey bar 1 (office, west wall): opens the green key's hatch
- 10Pressure plate on the grey block
- 11Purple flip plank: a bridge while the plate is weighed
- 12The office window with no glass
- 13Monkey bar 2 (office, east corner): opens the green shutter
- 14Green shutter, with the push-pull block behind it
- 17Gap in the gallery rail, right above the lift's gate (Many Ways)
- 18Cargo lift: key console and two-handled chain
Lower level
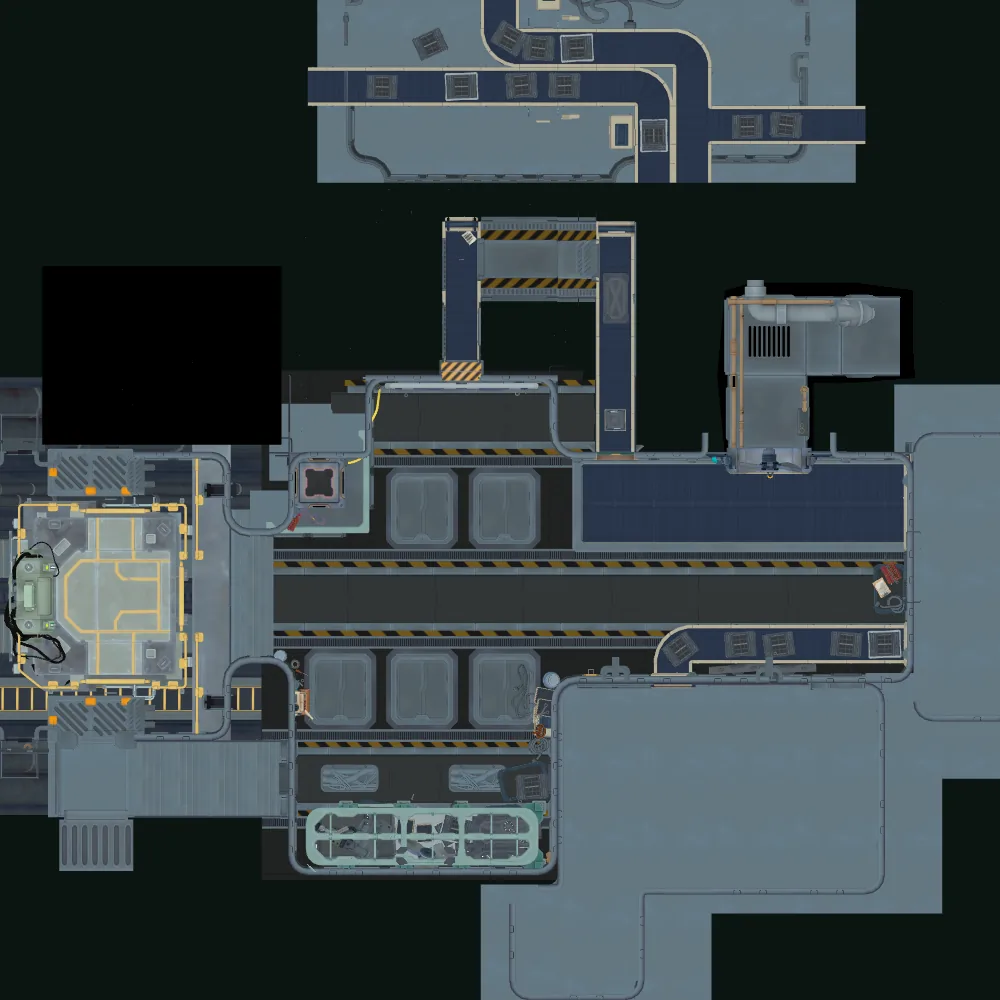 1351014151618195 m
- 1Start: lower corridor (both of you start here when you pick 3-2)
- 3Fan in the north wall: the way into the duct
- 5Fuse slot and fuse door
- 10Pressure plate on the grey block
- 14Green shutter, with the push-pull block behind it
- 15Purple key, under the office floor
- 16North end of the push-block channel: hook the purple key from here
- 18Cargo lift: key console and two-handled chain
- 19Doorway under the plank: blocked, but the way back out of the passage
The note on the fuse box points at the crane:
Solution
Show hint
The fuse is not lost: it is hanging from the crane over the conveyor belt. Something on a catwalk lowers the crane, and the fan in the north wall is the way up there.
Both keys sit behind openings only the hook gets through, and both are opened by monkey bars in the office. One of you goes up to the office, the other one hooks.
Show the answerSpoiler
1. Open the fan, Goop Gun player climbs in3
Goop Gun player: drop down onto the conveyor belt below the fan (pin 3, the hall's north wall, east part; the belt is 1.6 m below the hall floor). Shoot one goop blob onto the fan so it stops, and build a two-blob stack on the belt right under it. Hook Gun player: from the hall floor at the edge of the belt, hook the stopped fan and keep holding. It swings aside. Goop Gun player: climb the stack and pull yourself up into the opening, 1.8 m above the stack top.
Not in the game files: exactly where the game accepts a goop blob or stack at the grey block, under the fan and on the lift floor. The files give the heights used here, not the goop placement checks.
2. Lower the crane, pull the fuse in42
Hook Gun player: you can let go of the fan now. Goop Gun player: follow the duct to its end, up the ramps, onto the east catwalk. The crane chain is at its west rail (pin 4). Pull it all the way and hold it: the crane comes down 4.7 m. Hook Gun player: stand on the hall floor right under the fuse, at the edge of the belt (pin 2), aim up and hook the fuse. It flies to you. Goop Gun player: let go of the chain.
3. Goop Gun player comes back down3
Goop Gun player: go back through the duct to the fan. Your goop is still on it, so the Hook Gun player only has to hook it open again from the hall floor. Drop out onto your stack and the belt, climb back up to the hall floor, then recall your goop.
Not in the game files: whether you can climb over the catwalk's hall-side fence (its collider is named ClimbableFence) and drop to the hall instead of going back through the duct.
4. Fuse door and the gallery1567
Hook Gun player: take the fuse south to the lower corridor where 3-2 starts (pin 1) and west to its end. Put it in the fuse slot (pin 5). The fuse door next to it opens 2 s later. Go up the stairs behind it (pin 6) and round the gallery to its north side (pin 7). Face north: the hatch in front of you hides the green key.
5. Goop Gun player climbs to the office101112
Goop Gun player: the grey block with the pressure plate (pin 10) is 3 m above the hall floor. Against its south side, build a stair: one blob, and a two-blob stack next to it. Jump up 1 m at a time onto the block, then recall your goop. Shoot one blob onto the plate: 1 s later the purple plank folds down. Build a two-blob stack against the wall north of the plate, climb blob, stack, then pull yourself up onto the ledge (2 m above the stack). Walk east along the plank (pin 11) and climb in through the window with no glass (pin 12). Leave your goop where it is: the blob on the plate keeps the plank down, and that is your way back out.
6. Green key978
Goop Gun player: in the office, jump up to monkey bar 1 on the west wall (pin 9, above the window into the white room) and hang on it. Hook Gun player, on the gallery's north side (pin 7): the hatch opens. The green key lies in the white room behind it (pin 8), 5.8 m from you. Hook it. You can't walk through the hatch: a barrier there only lets the hook through. Goop Gun player: let go.
7. Purple key13141615
Goop Gun player: go to the office's east corner, jump up to monkey bar 2 (pin 13) and hang on it until the Hook Gun player is back out. 2 s later the green shutter in the hall's north wall opens (pin 14). Hook Gun player: from the hall floor at the edge of the belt, in front of the shutter, hook the push-pull block behind it and pull: it slides out and drops onto the belt below the shutter. Drop down onto the belt, jump at the block, grab its top edge and climb up, then step up into the channel behind the shutter.
Hook Gun player: walk north to the end of the channel (pin 16). On your left (west) a low gap at chest height looks into the passage under the office: the purple key hangs there on a cable (pin 15), 7.4 m away. Hook it. Walk back to the shutter, drop onto the block and the belt, climb back up to the hall floor, and tell the Goop Gun player to let go.
Not in the game files: whether a jump from the hall floor can catch the striped ledge over the doorway under the plank (3.5 m up) and get you into the purple-key passage that way.
8. Keys in, both on the lift18
Goop Gun player: leave the office the way you came (window, plank, ledge, your goop stair), drop to the hall floor, then recall your goop. Either of you: put the green key in the left slot and the purple key in the right slot of the lift console (pin 18). Both of you: stand on the lift and pull the two-handled chain all the way. The lift starts: Onwards and Upwards unlocks. If the fuse is not in its slot at that moment, Many Ways unlocks 2 s later. 25 s after the start the next area loads.
Many Ways: start the lift without the fuse
Many Ways unlocks 2 s after the lift starts, but only if the fuse slot by the fuse door is empty at that moment. The fuse locks into its slot and the door never closes, so once the fuse is in, Many Ways is gone for this run. Decide before step 4.
Without the fuse the stairs to the gallery stay shut, and the green key can only be hooked from the gallery: from the lift floor it is 8.9 m away, more than the Hook Gun's 8 m. The gallery has one opening towards the lift: a 2 m gap in its inner rail right above the lift's gate (pin 17). The gallery floor there is 4 m above the lift floor.
Show the answerSpoiler
- Skip the fan, the crane and the fuse door (steps 1 to 4). Leave the fuse on the crane.
- Goop Gun player: on the lift floor right under the gap (pin 17), build a stair: one blob, and a two-blob stack next to it, close under the gallery's edge. Hook Gun player: jump up blob, stack, then pull yourself up onto the gallery (2 m above the stack top). Walk north along the gallery and round to its north side (pin 7).177
- Goop Gun player: recall your goop, climb to the office (step 5) and hang on monkey bar 1. Hook Gun player: hook the green key through the open hatch (step 6). Then drop back down through the gap onto the lift.
- Do the purple key (step 7) and the lift (step 8) as usual. Both of you must stand on the lift when the chain goes all the way down.
The lift floor is not one of the surfaces that throw goop back (only its gates and the chain handle are), and the 2 m pull-up is the most a climb allows.
Not in the game files: exactly where the game accepts a goop blob or stack at the grey block, under the fan and on the lift floor. The files give the heights used here, not the goop placement checks.
Not in the game files: whether starting 3-2 again from the checkpoint menu puts a used fuse back on the crane.
Common mistakes
- Putting the fuse in when you want Many Ways. It can't come out again.
- Hooking the fan before it is gooped. The hook only catches it while goop holds it still.
- Letting go of a monkey bar too early. The hatch and the shutter shut as soon as the bar comes up, and the shutter shuts at once.
- Recalling all your goop while you are in the office. The plank folds up and covers the window, and the plank is the way back out.
- Trying to hook the fuse from the catwalk or with the crane up. It is out of reach from both; only the hall floor right under the lowered fuse works.
- Trying to walk into the passage under the plank (pin 19). A barrier fills the lower part of that doorway; the striped bar on top is a ledge for climbing back out.
Achievement
Onwards and Upwards
Activated the Cargo Elevator
How it unlocks (spoiler)
Both of you stand on the cargo elevator (3-2 The Assembly Line), then pull its chain all the way.
Items: 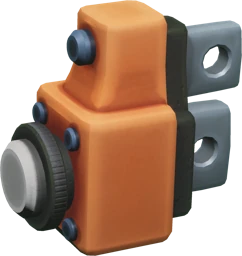 Fuse
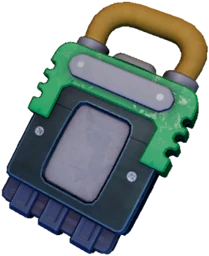 Green key
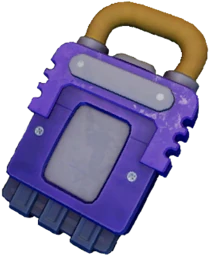 Purple key
Many Ways Missable
Activated the Cargo Elevator without using a Fuse
Start the cargo elevator (both of you on it, chain pulled all the way) while the fuse slot at the fuse door is empty. Never put the fuse in: it locks in place and the door stays open. Without the fuse door, the Hook Gun player gets up to the gallery for the green key over a goop stair on the lift floor, through the gap in the rail above the lift gate. The Cargo Elevator page has the whole route.
Items: Fuse
Read from the game files of version 1.1.1 (no guesswork). Something wrong in your game? Tell us and we will check it. Report a problem